
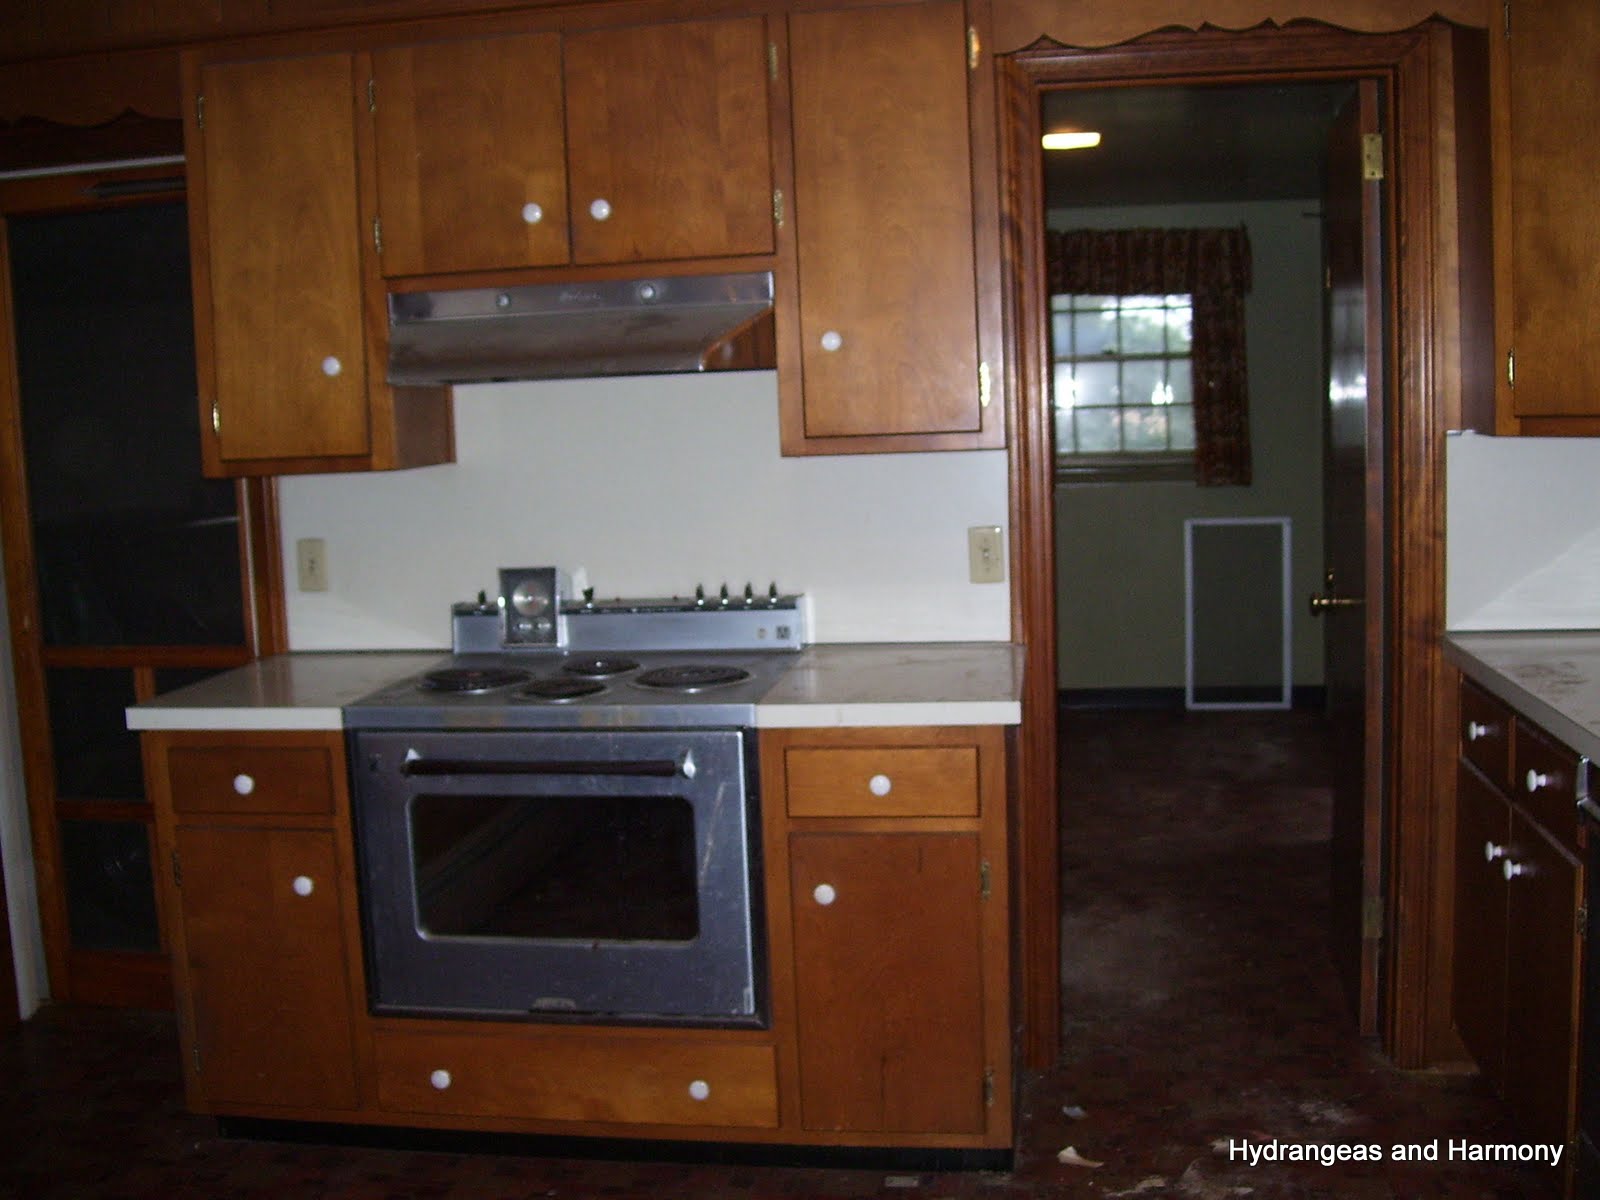
Here's what we started with
lots of dark cabinets,
old wallpaper,
paneling,
a leaky sink faucet,
scuzzy, crusty countertops,
a really, really nasty linoleum floor with weird burn spots or something on it,
a leaky dishwasher,
and an oven that was hardwired to 100amp and connected with electrical tape.
There was also a funky kinda smell going on in there.
And of course, we have the "Narnia" lamp.

Looking towards the dining room.


When we moved, my sister cleaned all of the cabinets out for us. Before I put anything away, I scrubbed them down again and laid down new shelf paper. Then I tried to wipe down the grimy wallpaper. Big mistake. It started disintegrating right off the wall. This is what it looked like after 2 days of "washing" and scraping...
(Oh, we also had this weird built in light cornice thing on the wall opposite the sink.)


We removed the 'cornice' light and installed these cabinets from the Re-Store for extra food storage. They act as a pantry space for us.


The next thing we tackled was the removal of the Narnia lamp. We were going to cut back the weird half-wall but the baseboard radiators create some difficulties there. For the time being, we're going to keep that wall as is. Bass did have to build out a header because the original molding went all the way up to the ceiling.

This spring, we tackled the next big change... painting all of the trim and woodwork and cabinets. We can't swing a total gut job at this point but figured that $50 worth of paint could make enough of a difference that I would be able to live with the existing kitchen for a few more years.
The soffit, doors, and trim now all match the rest of the house (Crumb Cookie by Olympic). I wanted to lighten up the kitchen but still have contrast with the light trim and counter-tops so I chose a greige color. I painted the cabinet hinges with a spray paint that matches the cabinet doors. We got black drawer pulls for the drawers and simply spray painted the old white knobs with black. Bass did fill and re-drill the knob holes to put them in a better position. It took almost 3 weeks of daily painting but we did it.
 |
| I painted the previously gold frame on this picture black to match the space better. |
 |
| I covered foam board with pretty scrapbook paper to create a faux back for this niche. It sits in front of the microwave hood plug to hide it. I'd like to collect some more white creamers to add to my collection. |
 |
| New clean stove and microwave. Bass had to cut out the cabinet below the old drop-in stove to make our freestanding unit fit. He also removed an entire cabinet above the old stove hood to make room for the microwave. He used the wood from the old cabinet to face the shelf he installed to support the new micro-hood. |
 |
| New light fixture to replace the old 'in-the-ceiling' square light thing. |


The view from the dining room...

We're loving the lighter, more cottage-y look. Well, I'm loving the new look. Bass is just loving the happier wife. :) Next year we hope to maybe redo the back-splash and paint the counter-top. Until then, I'm enjoying it!
Linking up to these great blog parties:
Sunday: Sunday Showcase at Under the Table and Dreaming; Tuesday: One Project at a Time at A Bowl Full of Lemons; Tutes and Tips at Home Stories A to Z; Show Me What Ya Got at Not Just a Housewife;
Wednesday: Wicked Awesome Wednesday at Handy Man, Crafty Woman; It's Overflowing at Overflowing with Creativity; Whatever Goes Wednesday at Someday Crafts;
Home Decor and Organizing at Organize and Decorate Everything;
Thursday: Delightfully Inspiring Thursday at Delightful Order; Transformation Thursday at The Shabby Creek Cottage;
Friday: Frugal Friday at The Shabby Nest; Flaunt it Friday at Chic on a Shoestring;
Amazing transformation. I love your choice of colours.
ReplyDeleteThanks! I can't wait to try to paint the countertop and backsplash.
DeleteWhat a wonderful transformation from the dark to the light. It looks really nice. i just love that look. Your newest follower.. come and see me.. Hugs, Cindy
ReplyDeleteYes, we're enjoying the change. I'll be dropping by your blog. Thanks for following me.
DeleteBeautiful!
ReplyDeleteWow! Your kitchen looks amazing! Beautiful color scheme and I love that you took your time and did it slowly :)
ReplyDeleteJust found your site and I love it!this kitchen is soooo Gorgeous! and It is so modern and clean looking. I’m really impressed.
ReplyDeleteFurniture Store Parker
Furniture Store Denver
Kitchen Cabinets Parker